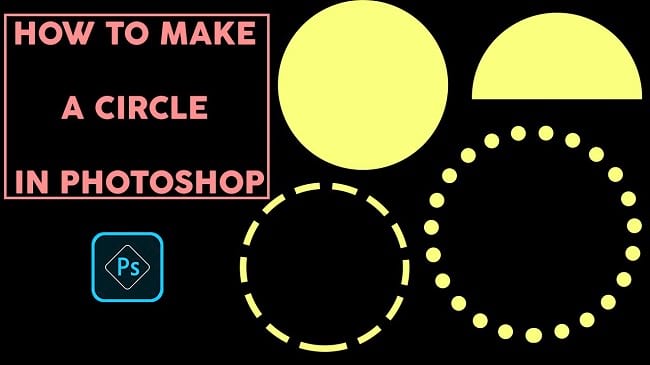
If you want to make a circle in photoshop, you can do it by yourself easily. In this article, I am going to show you How to make a circle in Photoshop. So, read this article till the end and follow the steps with care, you will be able to do it. So, lets see how to do it:
Make a Circle in Photoshop
- First of all, create a new document. To do that, go to the “File” menu and then select the “New” option. You will see that a window has appeared where you can choose a preset canvas or create a custom canvas. There are various preset sections available like photos, print, Art & Illustration, Web, Mobile, and Film & Video. So, go to one of those sections, select the preset canvas whichever you want and click on the “Create” button. If you want to create a custom one, give “Width” and “Height” size and click on the “Create” button. A new document will be created afterward.
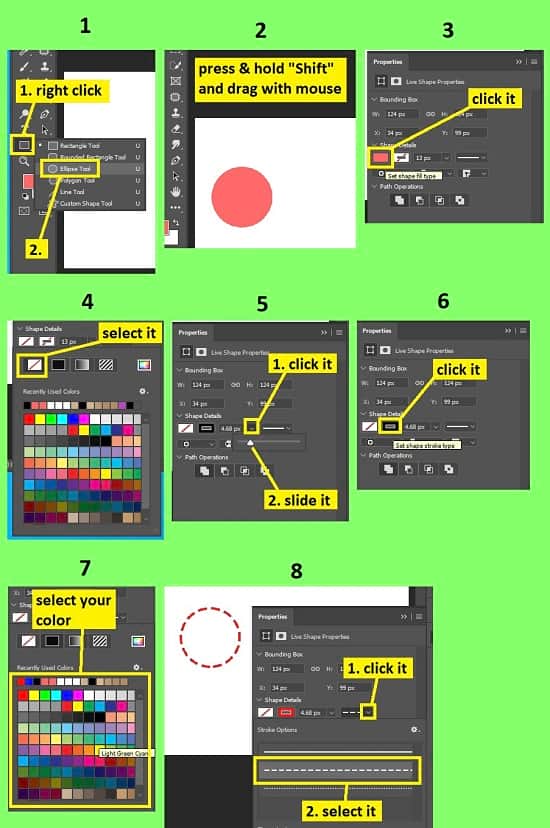
- Now, go to the left side tools panel and right click on the “Rectangle Tool” and select the “Ellipse Tool”.
- Now, hold the “Shift” button from your keyboard and hold the left mouse button & drag the mouse on the document, you will get an equal proportioned circle. You may get a filled circle.
- You will see a properties panel has also appeared. So, from the properties panel, in the “Shape details” section, click on the “Set shape fill type” button and select the “No color” option. You will get a blank circle.
- Now, you can design this circle as per your choice. I will show you some examples below.
Some Circle Designs Examples
Thicken the Circle Line
If you want to thicken the circle line,
- Go to the properties panel.
- In the “Shape details” section, go to the “Set shape stroke width” option, you can thicken the line in two ways. One, type pixel amount in the field. And the other one, click on the down arrow and slide the slider.
- Circle line will thicken afterward.
Change the Circle Line Color
If you want to change the circle line color,
- Go to the properties panel.
- In the “Shape details” section, click on the “Set shape stroke type” option which is the second icon and then pick any color from the color palette.
- Circle line color will be changed afterward.
Fill the Circle with Solid Color
If you want to fill the circle,
- Go to the properties panel first.
- In the “Shape details” section, click on the “Set shape fill type” option, then click on the “Solid color” icon and you will see the color picker has appeared.
- So, pick any color from the color palette.
- Circle will be filled with color afterward.
Change the Circle’s Line to Dash or Dot
If you want to make the circle with dash and dot,
- Go to the properties panel.
- In the “Shape details” section, click on the “Shape options” option which is the fourth option, then click on the dash or dot and you will see the circle is made with dash and dot.
Create a New Same Circle Layer with Different Color
If you want to make another same sized circle with different color,
- Go to the layer panel, right click on the circle’s layer and select the “Duplicate layer” option. A window will appear, click “OK”. Same sized circle layer will be created. Now, go to the left side’s tools panel and select the “Move tool”. Now press & hold the “CTRL+ALT” and click & drag the circle to any side, circle will be copied.
- Go to the properties panel.
- In the “Shape details” section, click on the “Set shape stroke type” option which is the second icon and then select the “No color” icon.
- Now, click on the “Set shape fill type” option, then click on the “Solid color” icon and you will see the color picker has appeared.
- So, pick any color from the color palette.
- New Circle will be filled with color afterward.
Increase or Decrease the Area of the Circle
If you want to increase or decrease the area of the circle,
- First of all, select the circle from the layer panel. Or, select the “Move tool” from the left side’s panel and click on the circle you want to make the change.
- Then, press “CTRL+T” from the keyboard. You will see that area is selected.
- Now, press and hold the “Shift” button from your keyboard and drag the corner of the circle. It will increase the circle area in equal proportion.
Video Tutorial about “How To Make A Circle In Photoshop” who really don’t want to read whole article just follow below video.
That’s how you can make a circle in Photoshop. Above I have tried to show you the process of making a circle in the easiest way. I have shown you the way of using the ellipse tool to make a circle, changing circle color, fill circle color, thicken circle color, and many more. Here, I have included a few keyboard shortcuts to make the process easy for you. I hope you have understood How to make a circle in Photoshop. If you’re not able to make the circle perfectly, try and practise over and over again, you will be able to do it easily.