Photoshop is not only limited to editing photos and photo effects. Rather, photoshop also gives you a wide range of tools and effects to design the texts. If you want to turn a plain text into a curved text, photoshop has dedicated features to do this. In this tutorial article, I am going to show you How to curve text in photoshop. So, read this article till the end and follow the steps with care, you will get easy instructions from this article, you will be able to do it. So, lets see how to do warp text into shape:
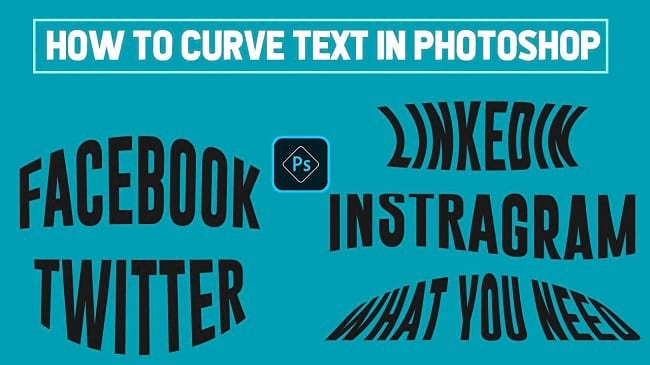
How to curve text in photoshop 2022
Step 1: Create a Blank Document or Insert a Photo for Text
To add a text, you have to either create a new document or insert a photo.
Create a Blank Document
First of all, create a new document. To do that, go to the “File” menu and then select the “New” option. You will see that a window has appeared where you can choose a preset canvas or create a custom canvas. There are various preset sections available like photos, print, Art & Illustration, Web, Mobile, and Film & Video. So, go to one of those sections, select the preset canvas whichever you want and click on the “Create” button. If you want to create a custom one, give “Width” and “Height” size and click on the “Create” button. A new document will be created afterward.
Or, Insert a Photo
First of all, insert a photo in photoshop. To do this, go to the “File” menu and select the “Open” option. Then, go to your image location and select your image and then click on the “Open” button.
Step 2: Insert Text
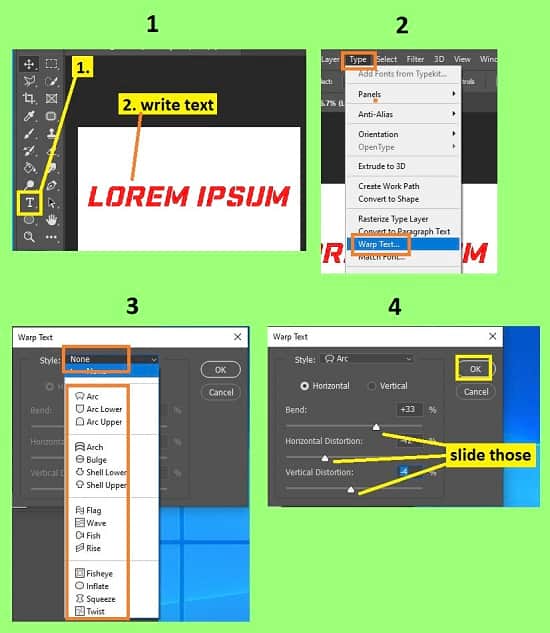
If you have inserted a photo or created a new document, now you have to write the text. To do that, click on the text icon which is “T” from the left side tools panel. Or, alternatively, simply press the “t” button from your keyboard, the text tool will activate. Then, click on your document and write your text.
Step 3: Increase the Size of the Text
You can increase the text in two ways. Let’s see how to do:
Increase by Free Transform
To increase the size, first select the move tool from the left side tools panel. Then select the text layer and then press “CTRL+T” from the keyboard. Now click & hold the corner of the text and increase the size as per your preference. After resizing the text, press “Enter” from the keyboard or press “v” from the keyboard to stop the free transformation. “V” in photoshop is selecting the “Move tool”
Or, Increase by Font Size
- To increase the text size, go to the left side’s tools panel and select the text tool. Or, press “v” from the keyboard to select the text tool.
- Now, go to the layer panel and click on the text layer.
- Then, go to the top bar, click on the text size drop down menu and select the size. Or type the size amount in the text size field and press the “Enter” button from the keyboard.
Step 4: Curve Text
Now, we will do the curve on text.
Wrap Text Method
- Go to the “Type” menu and select the “Wrap text” option. A dialog box will appear.
- From the dialog box, if you click on the “Style” drop down menu, you will see various text styles there. So, select every text style at a time and see the effect. You can choose the style effect either in horizontal or vertical. After selecting the style, you can also adjust the “Bend”, “Horizontal distortion” and “Vertical distortion” of every style.
- After selecting the text style and doing necessary adjustments, click on the “OK” button.
Free Transform Method
Free transform method is another way to curve the text.
- To activate the free transform around the text, go to the “Edit” menu and select the “Free transform” option. Or, simply press “CTRL+T” from your keyboard, free transform will be activated around the text.
- Now, go to the top bar and select the “Switch between free transform and warp modes” button. You will find this button on the right side of the “Interpolation” option.
- After that, in the top bar, go to the “Warp” drop down menu and select your style.
- Now, adjust as you like
Video Tutorial about “How To Curve Text In Photoshop” who really don’t want to read whole article just follow below video.
That’s how you can curve a text in photoshop. In this article I have shown you how to insert text in a photo, and how to curve text. Also I have shown you two different methods to curve text. I hope you have understood How to curve text in photoshop. This is a very easy technique to use. You can bring your artistic imagination to your text with this technique and make the text more amazing.