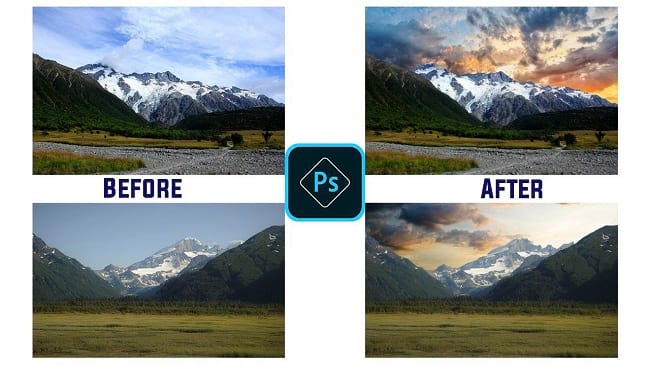
When you capture lots of sky photos, not all sky photos will be perfect and you may need to change the color of the sky. Not only that, you may want a blend of two sky images. In those cases, you can use photoshop to change the sky color. In this tutorial article, I am going to show you How to change sky color in photoshop. So, read this article till the end and follow the steps with care, you will get easy instructions from this article, you will be able to do it easily.
However, let’s see how to change the sky color:
Photoshop change sky to sunset
Step 1: Open Your Photo in Photoshop
To open your photo in photoshop, go to the “File” menu and select the “Open” option. Then, go to your image location and select your image and then click on the “Open” button. Your image will be opened in photoshop afterward.
Step 2: Change Sky Color
Method 1:
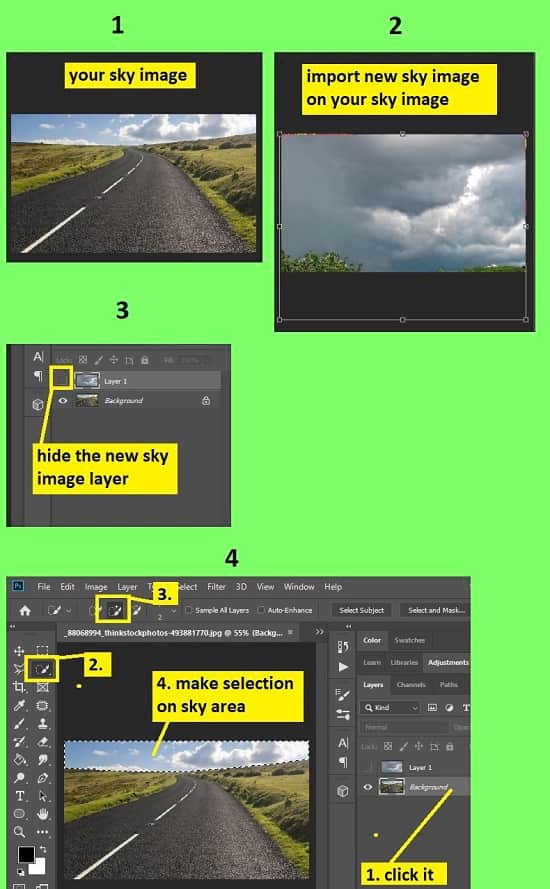
- First of all, you have to insert a new sky image in the existing image. You can insert image in two ways:
- Go to your image location where you have your saved image. Then, hold & drag the image towards the photoshop application in the taskbar, photoshop will pop up, then release the image there. A new layer will be created.
- Or, Go to the “File” menu and select the “Open” option. Then, go to your image location and select your image and then click on the “Open” button. Your image will be opened in a new tab in photoshop afterward. Then go to the left side’s tools panel & select the “Move tool”, then click & hold the image & drag it to your existing image’s tab, that tab will pop up and then release the mouse in the image. Your image will be imported in your existing image and a new layer will be created. Or, alternatively, go to your new inserted image tab, press “CTRL+A” from the keyboard to select the whole image, then press “CTRL+C” from the keyboard to copy the whole image, then come to the existing image’s tab and press “CTRL+V” to paste the copied image. A new layer will be added.
- Now, go to the layer panel and hide the new image layer you have added now. To do that, just click on the eye icon of the layer.
- Now, in the layer panel, select the background layer. Now, make a selection around the sky. To do that, you can use selection tools like, “Lasso tool”, “Polygon lasso tool”, “Quick selection tool” or “Magic wand tool”.
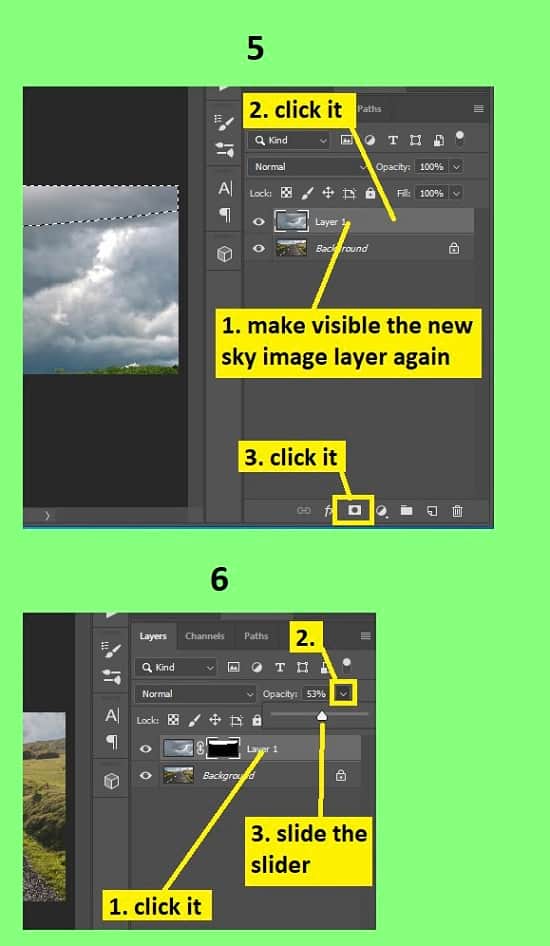
- Now, make visible the hidden layer. To do that, click on the eye icon area, your layer will be visible again.
- Now, in the layer panel, select the new layer you have added and then click on the “Add layer mask” button from the bottom of the layer panel.
- Now, in the layer panel, increase or decrease the level of the “Opacity” option to change the color.
Method 2:
- First of all, you have to insert a new sky image in the existing image. You can insert the image in two ways. I have explained in “Method 1” how you can insert the image, read that, you will understand.
- Now, after inserting a new sky image, go to the layer panel and hide the new image layer you have added now temporarily. To do that, just click on the eye icon of the layer.
- Now, in the layer panel, select the background layer. Now, make a selection around the sky. To do that, you can use selection tools like, “Lasso tool”, “Polygon lasso tool”, “Quick selection tool” or “Magic wand tool”.
- After making a selection, in the layer panel, select the background layer and then click on the “Create a new layer” button from the bottom of the layer panel. A transparent layer will be created in between the background layer and your new sky image layer.
- Now, go to the left side’s tools panel, click on the foreground color and select a color you want to give to your sky.
- Then, go to the layer panel again, select the transparent layer you have just created and press the “ALT+Backspace” buttons from the keyboard. Selected portion of the transparent layer has been filled with your selected foreground color.
- Now, make visible the hidden new sky image layer. To do that, click on the eye icon area, your layer will be visible again.
- Now, in the layer panel, select the new sky image layer you have added earlier, then right click and select the “Rasterize layer” option from the context menu, and then again right click and select the “Create clipping mask” option from the context menu.
- Now, in the layer panel, increase or decrease the level of the “Opacity” option to change the color.
- That’s it.
Video Tutorial about “How To Change Sky Color In Photoshop” who really don’t want to read whole article just follow below video.
That’s how you can change the sky color in photoshop. In this tutorial I have shown you the process of changing sky color in photoshop. Above I have described how to import images, how to use selection tools, and many more. Here, I have described 2 different methods of changing the sky color. For your convenience, I have included various keyboard shortcuts so that you can do your work fast. I hope you have understood How to change sky color in photoshop. This is a very easy way to change the color of the sky.